

DIY Plant Hanger
Posted by admin on
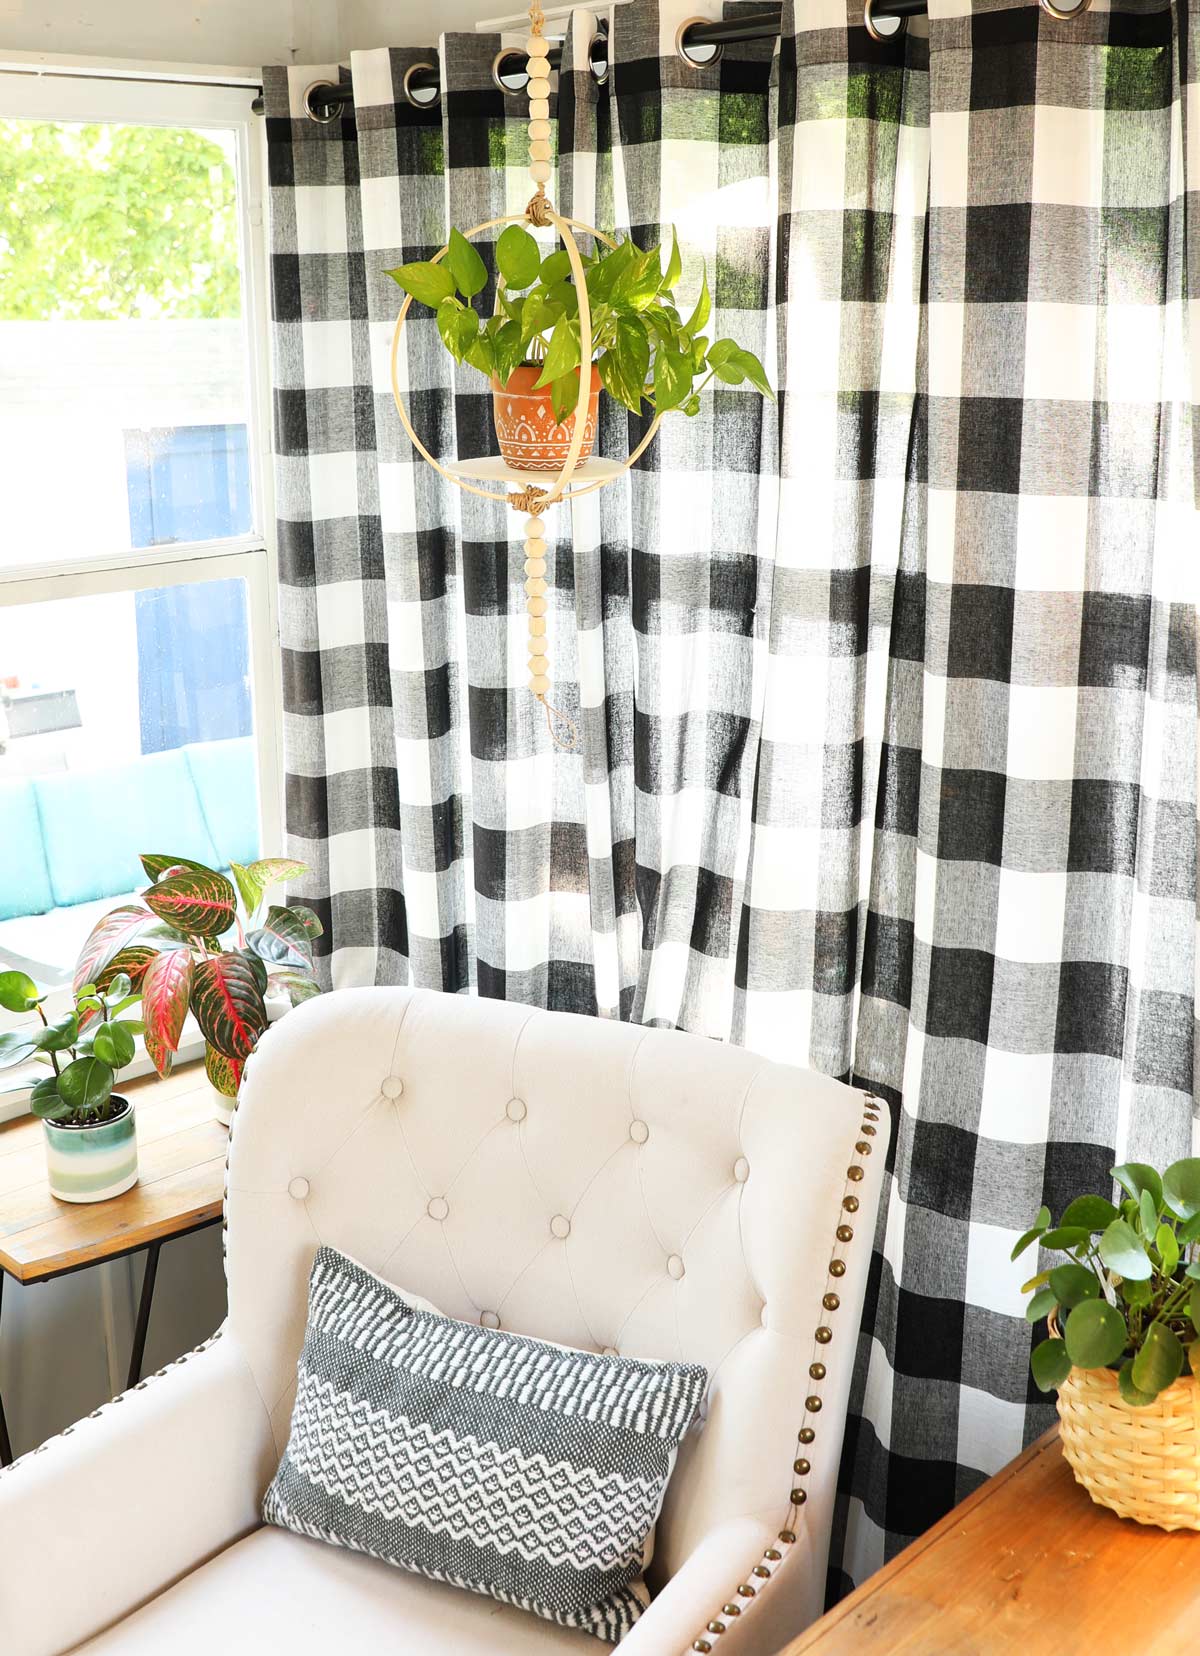
How to make a DIY plant hanger using embroidery hoops and Beacon Adhesives Power-Tac.
This post is sponsored by Beacon Adhesives but all opinions are my own.
It’s that time of year again where I turn the sunporch into a home for my plants. This year I decided I wanted to make some plant hangers. Hanging plants can be expensive so I figured why not turn some of my favorite plants into hanging plants by making a DIY plant hanger.
This DIY is so easy and really only took me under 20 minutes to make one!
A water proof and weather proof glue
Since the windows in my sunporch swap out to screens for the Summer I wanted to make sure I was using an adhesive that would stand up to the elements. Beacon Adhesives Power-Tac is super strong, dries crystal clear, flexible, water proof, weather proof, paintable, does not foam, does not expand, won’t bond to skin and does not yellow.
What I like about Power-Tac is that it dries in 10 minutes and cures in 24 hours.
Beacon Adhesives has given me a promo code for 20% off! Use code WEEKENDCRAFT20 for 20% off craft glues on their website. Exclusions apply.
Check out this no sew project that I also made with embroidery hoops.
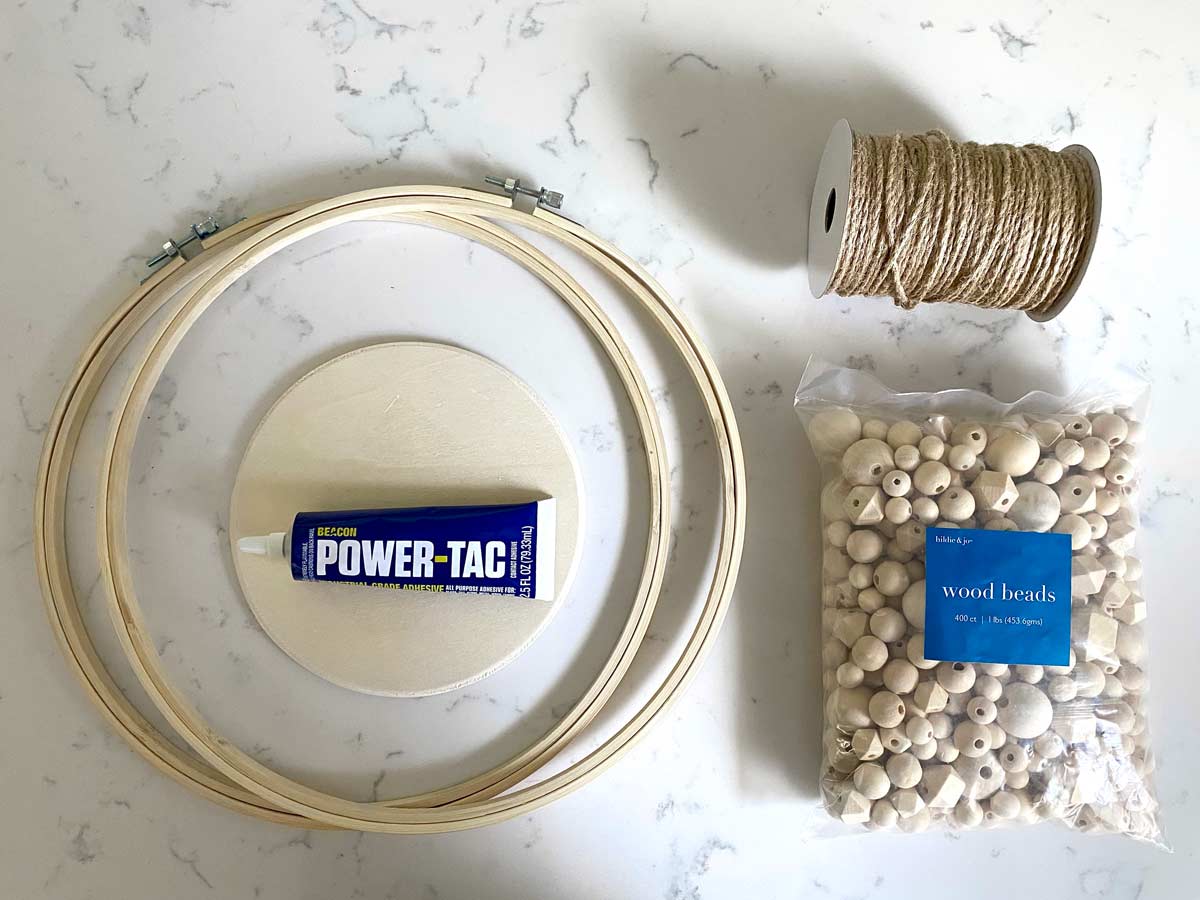
WHAT YOU’LL NEED
- 2- 12 Inch Embroidery Hoop
- 7 Inch Round Flat Wooden Circle
- Beacon Adhesives Power-Tac
- Twine
- Wooden Beads
- Scissors
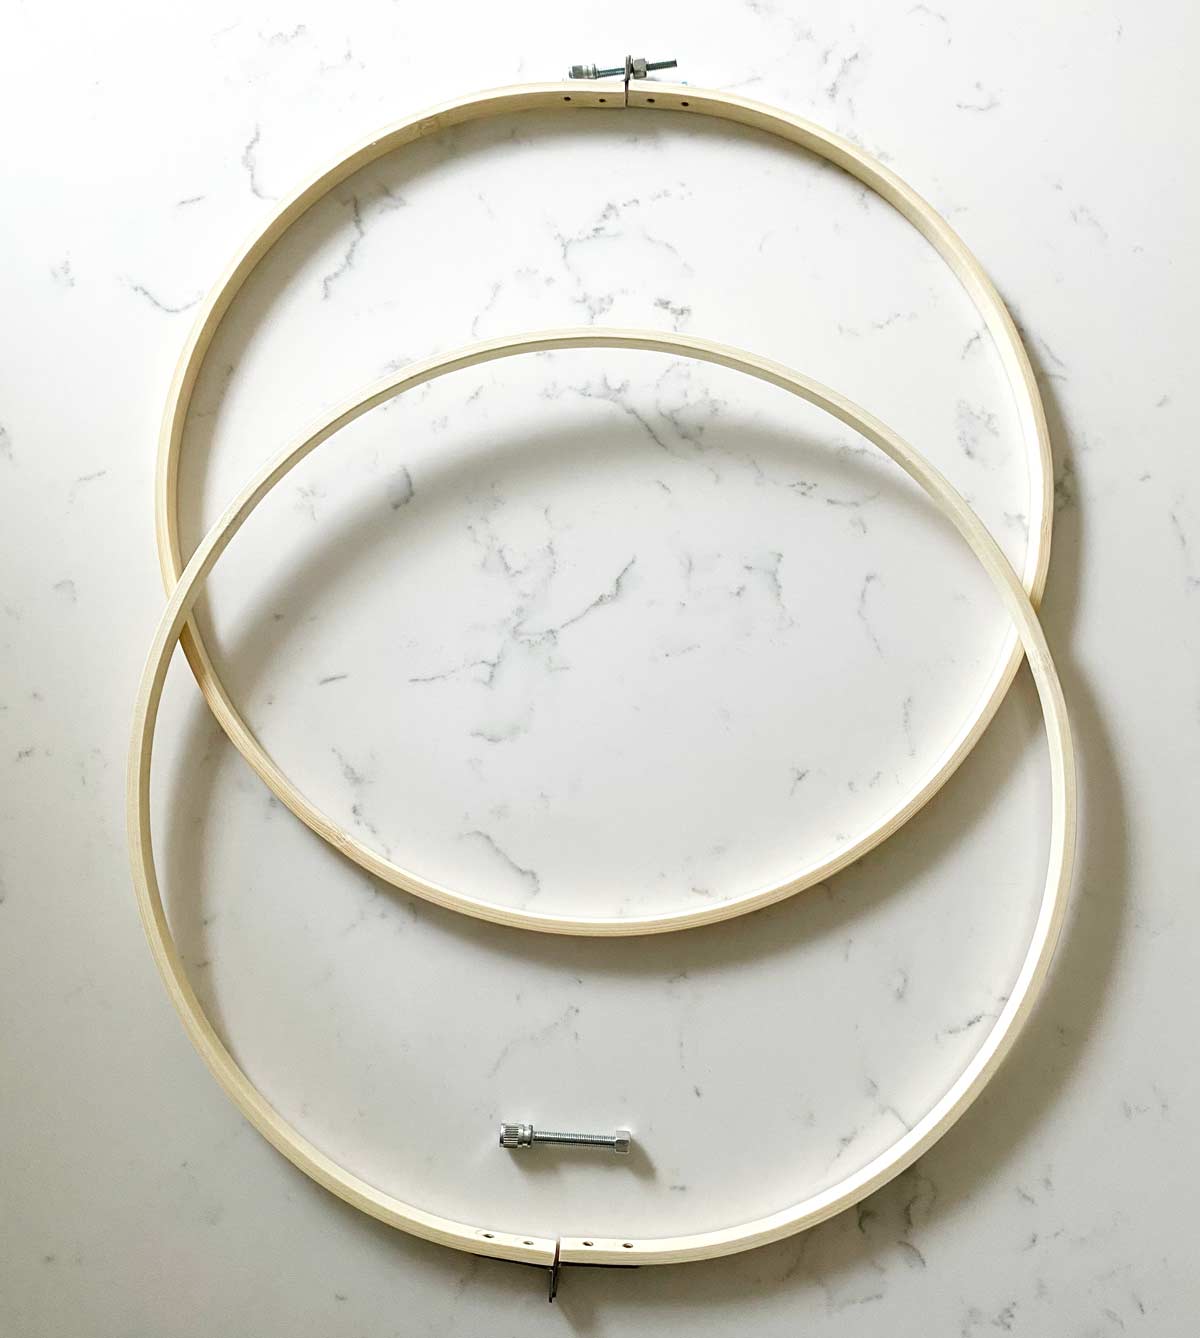
To make a DIY plant hanger I used two 12 inch embroidery hoops but this will also work with other sizes. I suggest 10 inch and 8 inch embroidery hoops if you want varying sizes.
How to make a plant hanger.
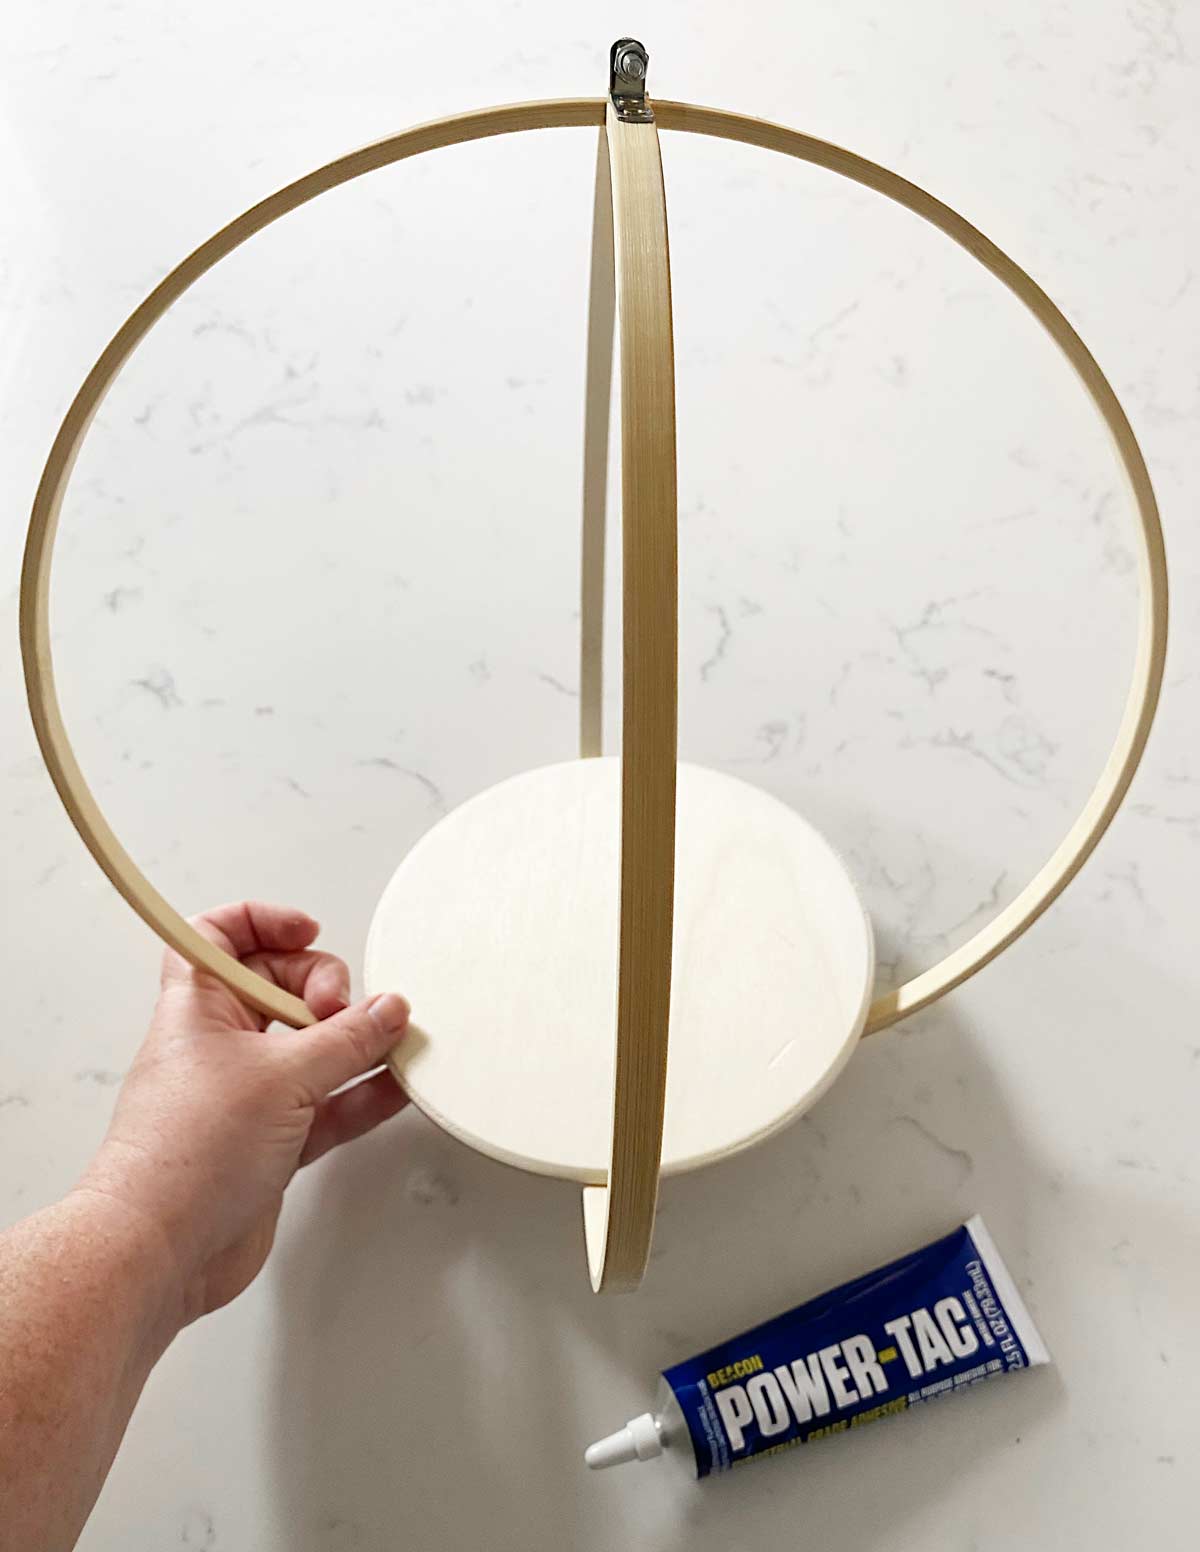
Take your two embroidery hoops and loosen the bolt on one hoop and remove it completely on the second hoop. Remove the inside hoops on both, you won’t be needing these.
Place the hoop with the bolt removed inside the other hoop. Place the middle of the hoop into the opening, where you loosened the bolt. It should look like an “x”. Slightly tighten the bolt. Do the same on the bottom and add the nut and bolt back on once it is in place.
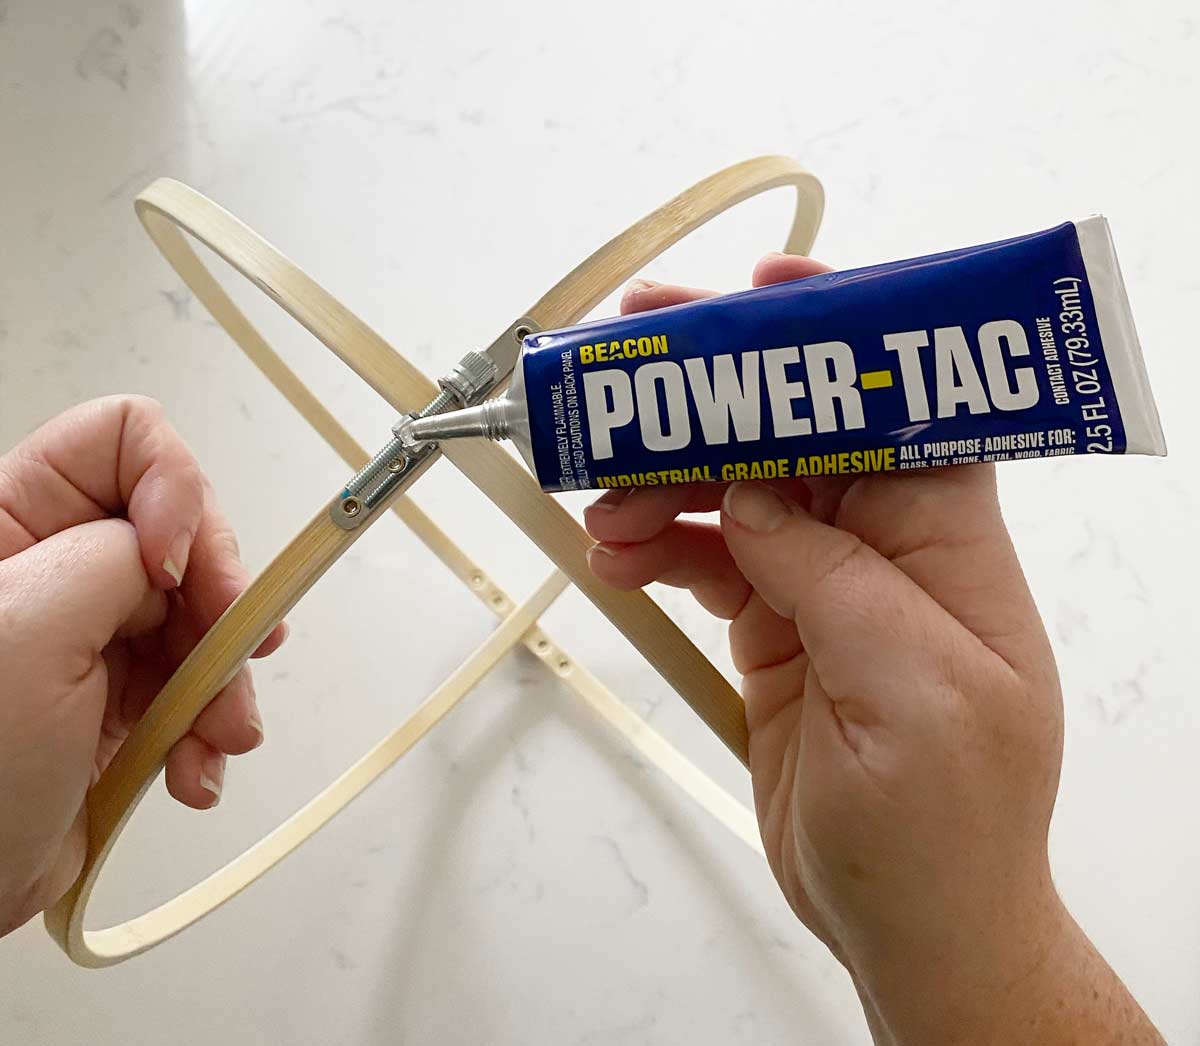
To get the hoops centered you may need to adjust the positions. Once you have the correct positions grab your Power-Tac. Loosen the hoops again and add glue to either side of the connecting hoop. Re-tighten the bolt and wipe away excess glue. Repeat this on the other side of the hoop.
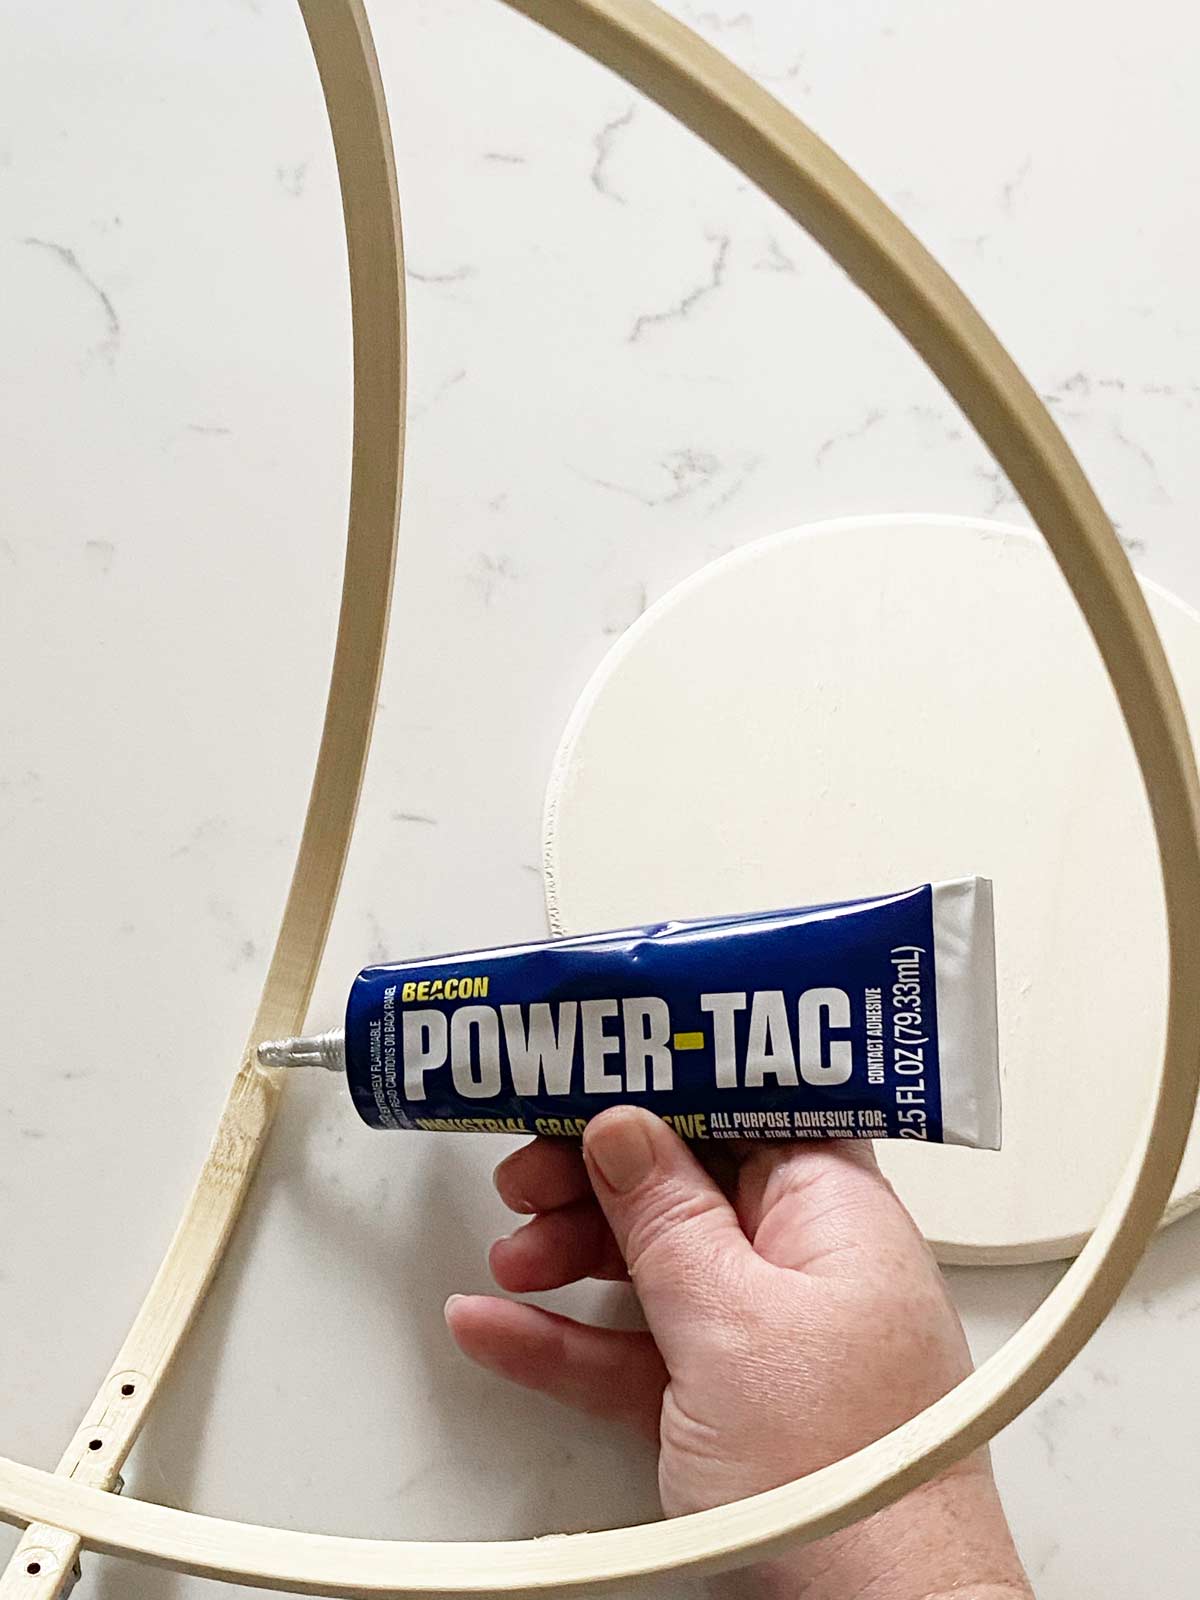
Let’s add the shelf for the plant to sit on. I grabbed this flat wooden circle from Walmart’s craft section. It’s 7 inches in diameter and makes a perfect shelf. Place the shelf in the hoops and mark where the wooden circle will sit. Add Power-Tac to the hoops and place the shelf back into position.
Let dry for 10+ minutes and cure 24 hours before adding a plant onto it.
Adding a hanger
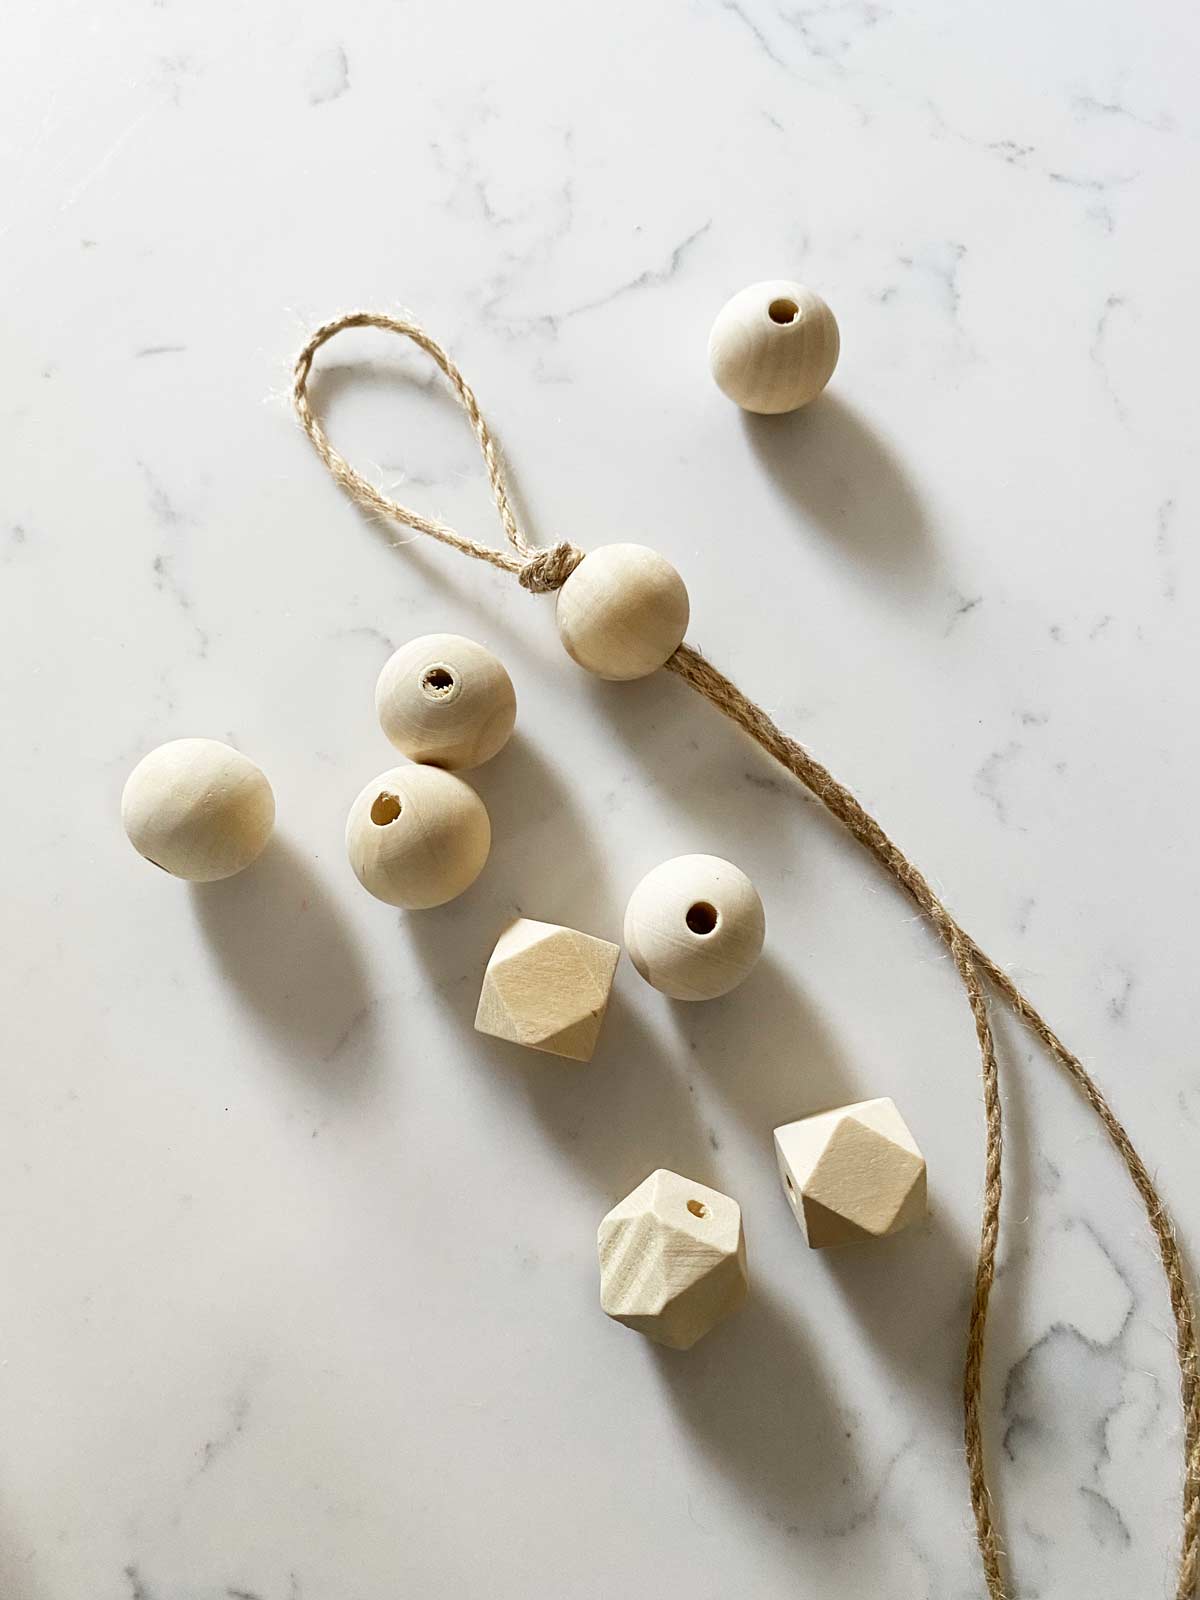
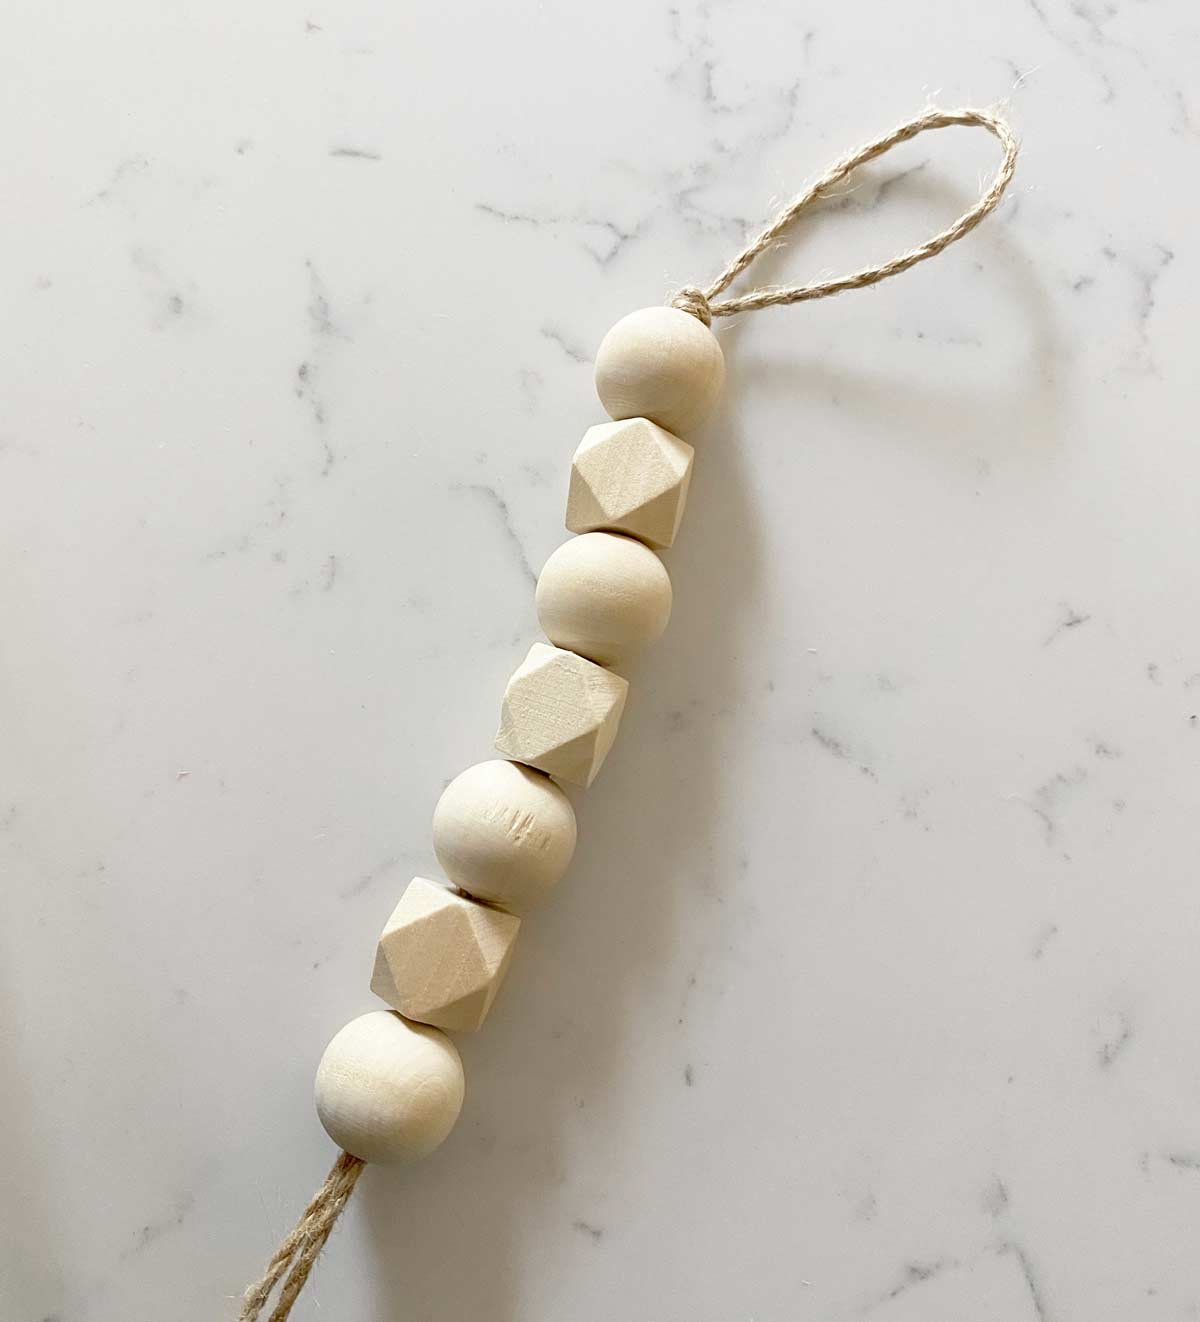
Now here comes the important part… How are we going to hang this planter? Grab some twine and wooden beads. Cut about a 3-4 ft piece of twine (depending on how low you want your plant to hang). Fold it in half and tie a knot creating a loop.
Add wooden beads to your twine in either varying sizes or shapes. Tie a not at the last bead.
Use the excess twine to tie the beaded string to the bolt at the top of your plant hanger. Wrap the extra twine around the bolts to cover the metal for a more finished look. Tie a knot and tuck in ends of the twine to hide them.
Repeat this same process for the bottom of the plant hanger.
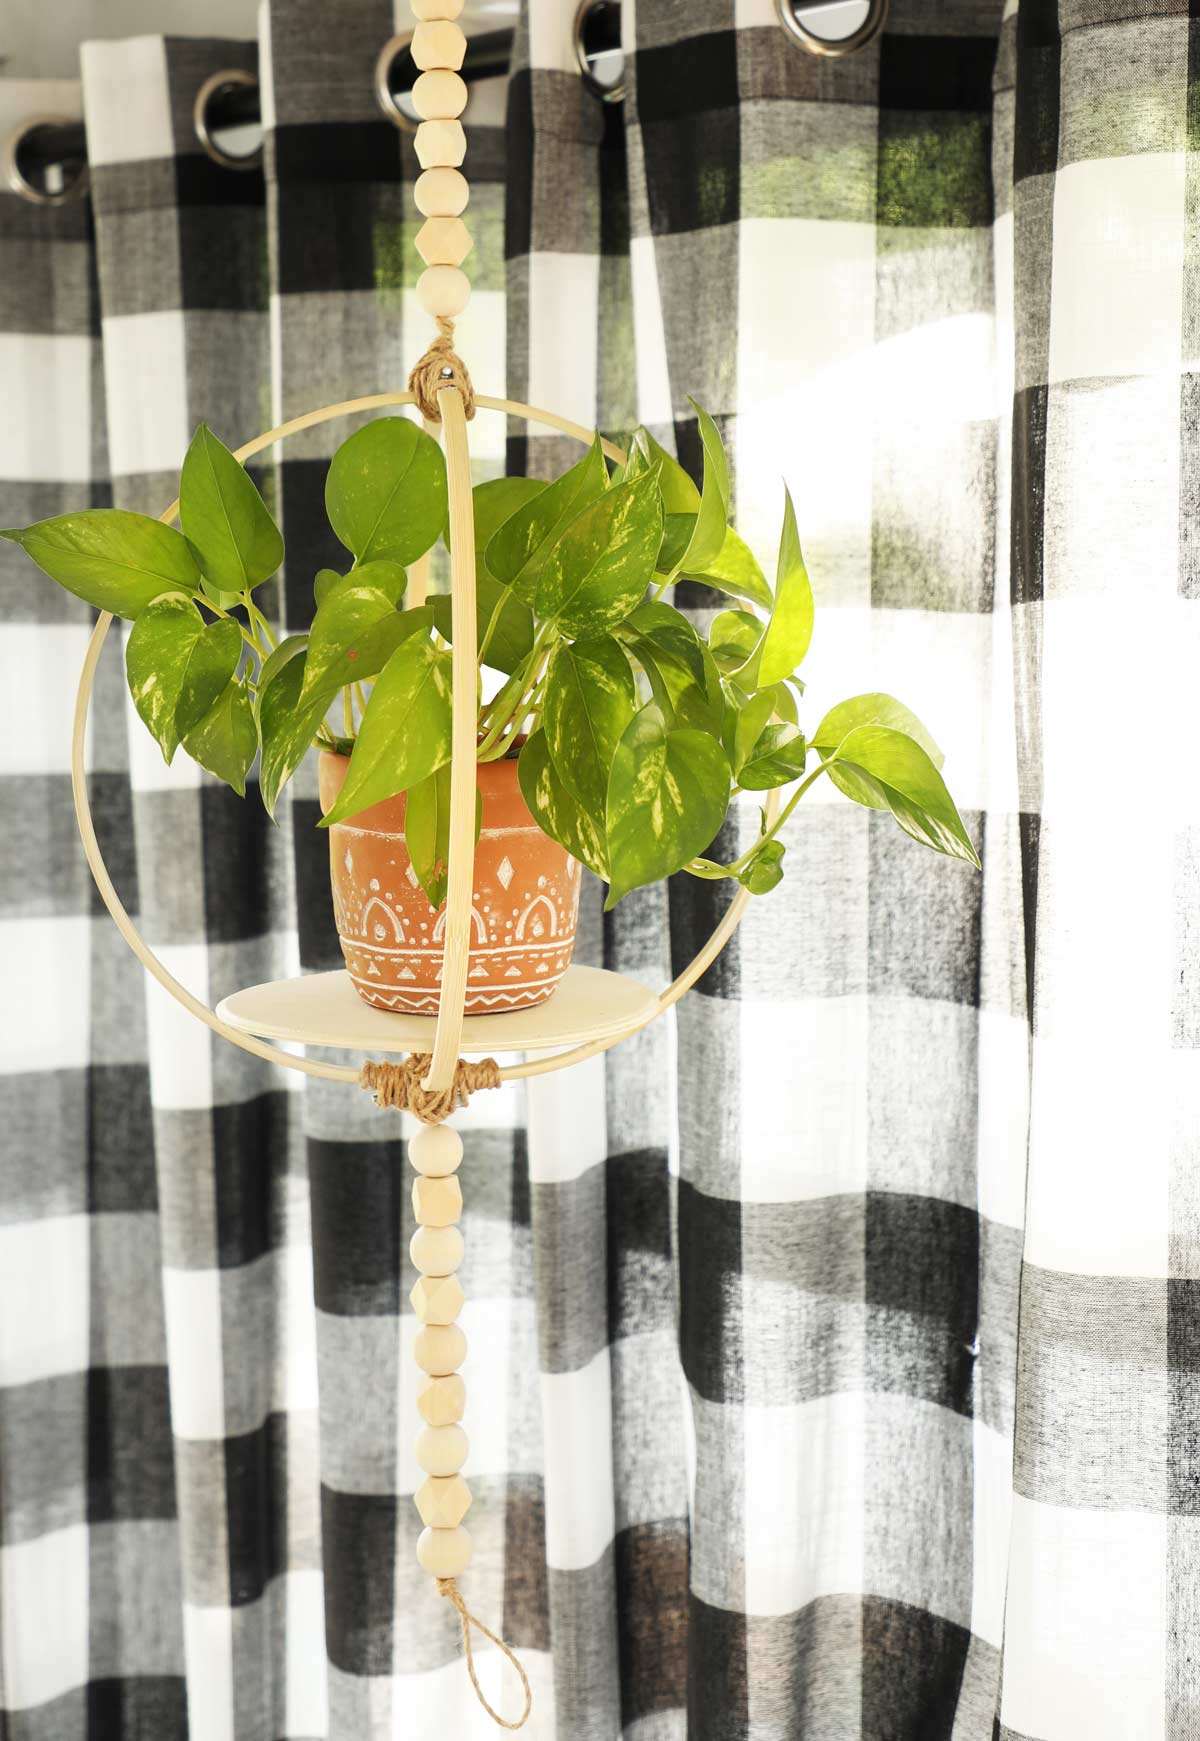
Once done you are ready to hang. I hung this planter from a cup hook in my ceiling. Then I added one of my favorite pothos plants. I love that I stuck with natural wood tones. It gives it more of a boho vibe.
The sunporch is starting to come together for the Summer but I may still treat myself to a few more plants! I may need to make a few more of these DIY plant hangers. I would love to make some that are different sizes.
The post DIY Plant Hanger appeared first on Weekend Craft.